
Business
In Depth Guide to Know When to Replace Your AC Unit

Understanding System Lifespan: Regional Climate and Runtime Realities
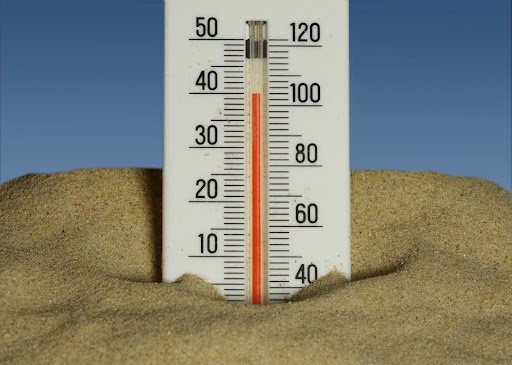
When considering AC replacement, understanding how long these systems typically last is crucial. While national averages often cite a lifespan of 15-20 years, this figure can be misleading for homeowners in high-demand climates like Las Vegas. Here, the intense heat and prolonged cooling season significantly impact equipment longevity.
Our research indicates that an AC unit in Las Vegas generally lasts between 8 and 12 years. This shorter lifespan is a direct consequence of the extreme operating conditions. For a deeper dive into understanding When to replace your AC unit, including various factors that influence its longevity, we recommend consulting a comprehensive guide on the topic.
National Averages vs. High-Demand Environments
The disparity between national AC lifespan averages and those observed in desert climates stems primarily from the sheer volume of work these systems perform. In milder regions, an air conditioner might run for only a few hundred hours annually. However, in Las Vegas, units can accumulate between 3,500 and 4,500 annual runtime hours. This constant operation subjects components to immense stress, leading to accelerated wear and tear. The relentless heat also means units often operate at or near their maximum capacity for extended periods, further contributing to premature aging and potential system failures.
How Operating Hours Accelerate Mechanical Aging
Every hour an AC unit runs contributes to its mechanical aging. Frequent compressor cycles, prolonged electrical stress on components, and continuous fan operation all take their toll. Beyond the internal mechanics, the harsh desert environment introduces external stressors. Fine dust particles can infiltrate the system, leading to coil degradation and reduced efficiency. Constant thermal cycling – the process of heating up and cooling down – also causes materials to expand and contract, which can weaken connections and lead to leaks over time. These factors combined mean that an AC unit in a high-demand climate simply works harder and degrades faster than its counterparts in more temperate zones.
The Core Decision Framework: When to Replace Your AC Unit
Deciding whether to repair a failing air conditioner or invest in a new system is a complex choice. It involves a careful diagnostic analysis of the current unit’s condition, an assessment of potential repair costs, and a projection of the return on investment from a new, more efficient system. We consider factors like the unit’s age, the nature of the repair, the type of refrigerant it uses, and the potential for efficiency gains to guide homeowners toward the most financially sound and comfortable decision.
Here’s a comparison to help illustrate the factors involved in the repair vs. replacement decision:
Criteria Repair Often Recommended Replacement Often Recommended System Age Under 8-10 years (in high-demand climates) Over 8-12 years (in high-demand climates) Repair Cost Minor component failure (e.g., capacitor, contactor) Major component failure (e.g., compressor, coil, heat exchanger) Refrigerant Type R-410A (minor leak, low cost) R-22 (any leak/recharge), R-410A (major leak, high cost) Efficiency Gains Minimal difference from new unit Significant savings from modern high-efficiency units Frequency of Repairs Isolated incident Frequent, recurring breakdowns Energy Bills Consistent with previous years Noticeably increasing year-over-year Comfort Issues Easily resolved with minor adjustments Persistent uneven cooling, humidity, noise Warning Signs: When to Replace Your AC Unit Before Total Breakdown
Often, an AC unit will provide several warning signs before a complete failure. Recognizing these indicators early can help us plan for replacement rather than reacting to an emergency breakdown. Key warning signs include:
- Frequent Repairs: If your AC unit requires multiple service calls within a single cooling season, or if repair costs are mounting, it’s a clear signal that the system is nearing the end of its functional life.
- Rising Utility Bills: A sudden or gradual increase in your electricity bills, without a corresponding change in usage habits or utility rates, often indicates that your AC is losing efficiency and working harder to cool your home. An older, less efficient unit can waste hundreds of dollars annually.
- Uneven Cooling: If some rooms are significantly warmer than others, or if the system struggles to maintain a consistent temperature throughout your home, it could point to a failing compressor, refrigerant issues, or an undersized unit.
- Strange Noises or Odors: Grinding, squealing, banging, or persistent rattling noises often signify worn-out parts like bearings or motors. Musty or burning smells can indicate mold growth or electrical issues.
- Excessive Humidity: An AC unit should not only cool but also dehumidify your home. If your indoor air feels clammy or sticky, even when the AC is running, its dehumidifying capabilities may be compromised.
- R-22 Refrigerant: If your system still uses R-22 refrigerant (often found in units manufactured before 2010), any leak or need for a recharge should prompt serious consideration for replacement due to the high cost and scarcity of this phased-out refrigerant.
Major Component Failures vs. Minor Part Repairs
Not all repairs are created equal. Understanding the difference between a minor part replacement and a major component failure is critical for making an informed decision.
Minor Repairs typically involve smaller, less expensive parts that are relatively easy to replace. Examples include:
- Run Capacitors: These electrical components help start and run the compressor and fan motors.
- Contactors: These are switches that turn the major components on and off.
- Thermostats: A malfunctioning thermostat can cause a unit to not run or run inefficiently.
- Fan Motors (Outdoor Unit): While important, replacing the outdoor fan motor is generally less costly than a compressor.
These repairs are often worthwhile for units under 8-10 years old, as they can extend the system’s life for a reasonable cost.
Major Component Failures, on the other hand, are significant issues that often warrant replacement, especially on older units. These include:
- Compressor Failure: The compressor is the heart of your AC system. Its replacement is highly complex and costly, often approaching the price of a new unit.
- Evaporator Coil Leaks: The indoor coil is responsible for absorbing heat from your home’s air. A significant leak can be expensive to repair, especially if the unit uses R-22.
- Cracked Heat Exchanger (Furnace): While not an AC component, if you have a combined system, a cracked heat exchanger is a safety hazard (carbon monoxide risk) and almost always necessitates full system replacement.
- Refrigerant Line Leaks: While some small leaks can be patched, extensive or recurring leaks, particularly on older units, make replacement a more sensible option.
When faced with a major component failure on an older unit, the cost-effectiveness of repair quickly diminishes.
Financial Math: Evaluating Repair vs. Replacement in 2026
The financial implications of repairing versus replacing an AC unit are often the deciding factor for homeowners. In 2026, we consider not only the immediate repair cost but also the long-term savings from improved efficiency, the cost of phased-out refrigerants, and the availability of incentives.
Here’s a general overview of common HVAC repair costs compared to new system installation pricing in 2026. Please note that these are general ranges, and actual costs can vary based on location, system type, and specific contractor.
Repair Type Estimated Cost Range (2026) Run Capacitor $175 – $400 Contactor $150 – $350 Igniter / Flame Sensor $150 – $400 Control Board $300 – $700 Blower / Fan Motor $400 – $900 Refrigerant Leak + Recharge (R-410A) $400 – $1,500 Refrigerant Leak + Recharge (R-22) $900 – $2,500+ Compressor Replacement $1,400 – $2,875 Heat Exchanger Replacement $1,500 – $3,500 For new system installations, costs typically range from $5,500 for a basic AC unit to $30,000 for a high-efficiency heat pump or full AC/furnace system, depending on tonnage, efficiency rating, and complexity.
The $5,000 Rule: When to Replace Your AC Unit Instead of Repairing
A useful financial benchmark we often use is the “$5,000 Rule.” This rule helps homeowners objectively decide between repair and replacement. To apply it, simply multiply the age of your AC system in years by the estimated repair quote. If the resulting number exceeds $5,000, replacement is generally the more financially prudent choice.
For example, if your 10-year-old AC unit needs an $800 repair, the calculation would be 10 years * $800 = $8,000. Since $8,000 is greater than $5,000, the rule suggests replacement. Conversely, a $300 repair on a 5-year-old unit (5 years * $300 = $1,500) would indicate repair.
Another related guideline is the “50% Rule”: if the cost of a single repair exceeds 50% of the cost of a comparable new system, then replacement is typically recommended. This rule adapts better to varying equipment costs and inflation, as it directly compares the repair cost to the current market value of a new unit. Both rules serve as valuable tools for making a data-driven decision, helping to avoid throwing good money after bad.
The Refrigerant Factor: Phased-Out R-22 and Emerging A2L Systems
The type of refrigerant your AC unit uses plays a significant role in the repair vs. replacement decision, especially in 2026.
R-22 Refrigerant: Systems manufactured before 2010 likely use R-22 (often called Freon). The production and import of new R-22 were completely phased out by the EPA in 2020. This has led to a drastic increase in its cost, with R-22 now costing between $150 and $400+ per pound. A typical recharge can require 3 to 6 pounds, making a single refrigerant leak repair potentially $600 to $2,400 just for the refrigerant. Given these exorbitant costs and the environmental impact, if an R-22 system develops a leak or requires a recharge, replacement is almost always the recommended course of action.
R-410A Transition to A2L Refrigerants: For systems using R-410A (common in units from 2010-2024), while servicing existing units remains legal, the industry is transitioning again. Starting January 1, 2025, new residential AC and heat pump equipment cannot use refrigerants with a Global Warming Potential (GWP) at or above 700. This means new systems manufactured in 2026 and beyond are transitioning to lower-GWP A2L refrigerants, primarily R-454B and R-32. While you are not required to replace your R-410A system, the long-term availability and cost of R-410A may fluctuate, making major R-410A leak repairs less economical over time. A2L refrigerants cannot be retrofitted into older R-410A equipment.
2026 System Costs, Efficiency Standards, and Rebate Dynamics
In 2026, the landscape for AC system costs, efficiency standards, and available incentives continues to evolve. New efficiency standards, known as SEER2 (Seasonal Energy Efficiency Ratio 2) and EER2 (Energy Efficiency Ratio 2), are in effect, requiring higher minimum efficiencies for newly manufactured equipment. These standards ensure that new systems are more energy-efficient, leading to lower operating costs for homeowners.
While the federal 25C tax credit for energy-efficient home improvements officially expired on December 31, 2025, homeowners should still investigate other potential incentives. Many local utility companies offer rebates for installing high-efficiency AC units or heat pumps. These rebates can significantly offset the upfront cost of a new system. Upgrading to a modern, high-efficiency heat pump, for example, can provide substantial long-term energy savings, especially if you are replacing an older, less efficient system. We recommend checking with your local utility provider for current programs and eligibility requirements.
Strategic Timing and Contractor Selection for System Replacement
Beyond the financial calculations and warning signs, the timing of your AC replacement and the quality of your chosen contractor are paramount. Strategic planning can save you money and ensure a smoother installation process.
Best Time of Year to Replace Cooling Equipment
For homeowners in Las Vegas, the best time of year to replace an AC unit is during the “shoulder seasons,” specifically spring (March-May). This period offers several advantages:
- Avoid Emergency Pricing: Waiting until the peak of summer, when temperatures soar and AC units are working overtime, often leads to emergency breakdowns. Emergency installations can cost 15% to 25% more than planned replacements due to high demand and expedited service.
- Better Scheduling Availability: During spring, HVAC contractors are less overwhelmed with emergency calls. This means you’ll have better scheduling flexibility and technicians can dedicate more time to a thorough and proper installation, ensuring optimal system performance.
- Potential for Better Deals: While equipment costs are relatively stable, some contractors may offer promotions or better pricing during off-peak seasons to keep their crews busy.
Planning your replacement in the spring allows us to avoid the intense heat of summer without an AC and prevents paying premium prices for urgent service.
Essential Standards for Hiring an HVAC Installer
Choosing the right HVAC contractor is as important as selecting the right equipment. A poor installation can negate the benefits of a high-efficiency unit and lead to premature breakdowns. When hiring an installer, we recommend looking for the following:
- Manual J Load Calculation: Insist on a contractor who performs a Manual J load calculation for your home. This ensures the new system is correctly sized for your specific needs, preventing issues like short-cycling (if oversized) or inadequate cooling (if undersized).
- Mechanical Permits: Verify that the contractor pulls all necessary municipal mechanical permits. This ensures the installation meets local building codes and passes required inspections.
- Ductwork Inspection: A new, efficient AC unit will only perform optimally if your ductwork is in good condition. A reputable contractor will inspect your existing ducts for leaks, blockages, or improper sizing and recommend necessary repairs or modifications.
- Written Warranties: Obtain clear, written warranties for both the equipment and the installation labor. Understand what is covered and for how long.
- Second Opinions: For any major repair or replacement quote exceeding a certain threshold (e.g., $1,500), we advise getting at least two to three quotes from different licensed and reputable contractors. This allows us to compare recommendations, pricing, and proposed solutions.
By adhering to these standards, we can ensure a high-quality installation that maximizes your new AC system’s lifespan and efficiency.
Frequently Asked Questions About Replacing an AC Unit
We often encounter common questions from homeowners navigating the repair vs. replacement decision. Here are answers to some of the most frequently asked questions:
How long does an air conditioner typically last before needing replacement?
The typical lifespan of an air conditioner varies significantly based on climate and usage. While national averages suggest 15-20 years, in high-demand environments like Las Vegas, AC units typically last between 8 and 12 years. This shorter lifespan is due to the extreme heat and prolonged operational hours. Regular annual maintenance can help maximize your unit’s lifespan, but eventually, operational hours and thermal cycling will lead to natural wear and tear.
What is the $5,000 rule in HVAC decisions?
The $5,000 rule is a practical guideline to help decide between repairing and replacing your AC unit. It involves multiplying your AC system’s age in years by the estimated repair cost in dollars. If the total product exceeds $5,000, replacement is generally considered the more financially sound decision. For example, if your 12-year-old unit needs a $1,000 repair, the calculation is 12 * $1,000 = $12,000, which suggests replacement. If a 6-year-old unit needs a $400 repair, the calculation is 6 * $400 = $2,400, indicating repair is likely appropriate.
Should I repair an older AC unit that still uses R-22 refrigerant?
If your older AC unit (typically pre-2010) still uses R-22 refrigerant and is operating without issues, you can continue to use it. However, if it develops a leak or requires any refrigerant service, we strongly recommend considering replacement. The cost of R-22 has dramatically increased due to its phase-out, costing $150 to $400+ per pound in 2026. A typical recharge can easily cost hundreds or even thousands of dollars just for the refrigerant, making it an uneconomical repair. Furthermore, the system is likely older and less efficient, making replacement a better long-term investment.
Conclusion
Navigating the decision of when to replace your AC unit can feel overwhelming, but with the right information, it becomes a strategic financial and comfort-driven choice. We’ve explored the critical factors, from the accelerated aging of systems in high-demand climates like Las Vegas to the financial benchmarks like the $5,000 rule. We’ve also highlighted the impact of refrigerant types and the importance of strategic timing and contractor selection.
By recognizing the warning signs, understanding the true cost of repairs versus replacement, and planning proactively, you can ensure your home remains comfortable and your energy bills stay manageable. Investing in a new, high-efficiency system is not just about fixing a problem; it’s about enhancing your home’s energy efficiency, improving indoor comfort, and securing peace of mind for years to come. Making a planned replacement decision, rather than an emergency one, almost always leads to better long-term outcomes and greater satisfaction.


Four tracksuits, every one of them sitting at CA$210, and a couple of clicks away a hoodie listing where nothing climbs past CA$150. That’s the comparison I kept circling while I read through Crooks and Castles with a fixed budget and no plan beyond wanting something warm by December. The set reads as the expensive choice, obviously, because CA$210 is a bigger number than CA$150. Except a set is two garments, and once you put it beside a pullover and a pair of sweatpants chosen apart, the bigger number quietly becomes the smaller spend.
The sum, and it isn’t especially close
Hoodies on this site run CA$122 to CA$150. Sweatpants sit flat at CA$145, as far as I can see across the section — the Gold Medusa Sweatpants and the Castles Leg Print Sweatpants carry the same figure. Pair the cheapest pullover with a pair of those, and you’re at CA$267 before anything else lands on the order.
| Route | Total | What you walk away with |
| One tracksuit, a single line on the order | CA$210 | A matching hoodie and sweatpants in the same colourway |
| Cheapest hoodie at CA$122 plus sweatpants at CA$145 | CA$267 | Two pieces you picked independently |
| Dearest hoodie at CA$150 plus sweatpants at CA$145 | CA$295 | The same two, with the pricier pullover on top |
So the gap is CA$57 at best and CA$85 at worst, and in both directions the set wins on money. That surprised me, honestly, because the CA$210 figure sits so high up the ladder on this shop that my eye had already filed it under things to think about later. Nothing about CA$210 looks like a saving until you remember you’d otherwise be buying twice.
Nobody publishes what half a set costs
Here’s the part that annoyed me. There’s no price anywhere for one half of a tracksuit on its own. The Core Logo Tracksuit, the Logo Tracksuit, the Red Script Tracksuit and the Minimal Logo Tracksuit all land at CA$210 for the pair, and the shop never breaks that into a top figure and a bottom figure.
Which means you can’t check your own arithmetic. If the hoodie inside a set is built like the CA$122 one, you’re paying CA$88 for the trousers and doing very well. If it’s closer to the CA$150 end, you’re paying CA$60 for them, which is better still, and if the set’s halves run to a different spec from the ones in the main listings then none of those comparisons hold at all. I can’t tell from the page. Neither can you. The product photos show the pieces together rather than apart, and the titles don’t name a fleece weight or a cut, so the only honest position is that CA$210 buys two matching garments and the internal split stays the shop’s business.
Who the matching pair actually suits
A set is one decision. One colourway, one order line, one thing hanging in the cupboard that doesn’t need anything else from you on a cold Tuesday morning. If your mornings are rushed, that’s worth real money.
It also solves a problem this catalogue creates. Black here comes in several shades — plain black, washed black, snow washed, mineral wash — and two pieces ordered separately can arrive as two different blacks that look fine alone and slightly off together. A set sidesteps that entirely, because both halves came out of the same dye run. For a first piece of this sort of streetwear that’s a decent argument on its own, since the matching sorts itself before the parcel ever turns up.
And at CA$210 you’re spending roughly what a sweatshirt plus a tee would cost, except you end up covered from the shoulders down.
Where two separates win
Flexibility, mostly. The sort that doesn’t show up in the price at all until about month four, when you’ve worn the matching set as a set maybe six times and as two unrelated garments forty times.
- Sizing is the big one. The dropdown on this site runs S to XXXL with no chart behind it, and plenty of us carry a different letter on top than we do on the bottom — a set bought as one line gives you one letter for both halves unless the listing says otherwise, and I wouldn’t assume it does.
- Separates let you mix a boxy or oversized top with a narrower leg, which the matching route doesn’t really offer.
- If one half wears through, you replace one half. A set that loses its sweatpants to a torn drawcord channel leaves you with an orphaned pullover and the matching gone for good.
| Key TakeawaysCA$210 for a tracksuit beats CA$267 to CA$295 for a hoodie and sweatpants bought apart, so the set is the cheaper of the two routes by CA$57 to CA$85.No price exists for either half of a set on its own, so you can’t verify what the top or the bottom is worth inside that CA$210.Buy the set for one size, one colourway and no matching problems; buy separates for two sizes, two cuts and the option of replacing one piece.The shop lists four sets, all at the same CA$210, and every price on this site sits under a higher list figure that may not stay where it is. |
Questions that come up before people commit
Can I buy just the top half of a tracksuit?
Not as a priced option on the set’s own page, no. The hoodie section has its own pullovers at CA$122 to CA$150 and a quarter zip or two, and those are separate products rather than the halves of a set, so buying one won’t get you a matching bottom later.
Is the saving worth giving up the choice?
Depends how much you’d use the matching. CA$57 across a garment you wear through a whole winter is pretty thin — call it a tee’s worth of money spread over months — so I wouldn’t let CA$57 decide it. Pick the route that fits how you dress and treat the saving as a bonus.
What about delivery on top of either total?
I’m not putting a number on that. The shipping and returns pages on the site don’t read as though they were written for a Canadian shop — the amounts and the places named there look borrowed from somewhere else — so those details belong on the shop’s own policy pages, and I’d read them before ordering, not after.
What I’d order, and why
Is this my first piece from the shop? Then I take the set. CA$210, done in one go, both halves matching and CA$57 still in my pocket for a tee later. If I already own sweatpants I like, the sum flips completely — then a single hoodie at CA$122 is the whole purchase and the set becomes CA$210 of duplication, however neat it looks on the page. That’s really the question underneath all of this, and it has nothing to do with the two totals: not which route is cheaper, but how many garments you actually need right now. Work that out first and the CA$57 sorts itself.

Eighty-five pieces sit in this shop, and that number is the real obstacle — not the prices, not the sizing, just the length of the scroll. I counted them because the grid never tells you where it stops, and somewhere past the fortieth photo my eyes quietly gave up on the difference between one washed black tee and the next one down. So here is the sorting order I’d use on Crooks and Castles with twenty minutes and a ceiling in mind, rather than a free afternoon and no plan.
What a single tile hands you
A photo, a product name, a crossed-out number and a lower one. That’s it, more or less. Click through and a size dropdown appears running S, M, L, XL, XXL and XXXL, and after that the page runs out of things to tell you.
I spent a while looking for a size chart, clicking around the footer and the product tabs the way you do when you’re sure a link must be hiding somewhere, and there isn’t one on this site at all. No chest width. Nothing on body length or sleeve, and no fabric weight either, which is a shame when you’re trying to judge a hoodie from a photo on a phone screen. So the picture ends up carrying the whole load, and the product name carries whatever the picture can’t.
Five sections, stocked very unevenly
The Crooks and Castles grid splits into t-shirts, hoodies, sweatshirts, shorts and sweatpants. Tracksuits don’t get a tab of their own; the sets just sit inside the listings beside everything else, which is mildly irritating when a matching set is the thing you came for. And the five groups are nowhere near the same size.
| Section | Roughly how deep it runs |
| T-shirts | About two dozen, the biggest group by some way |
| Hoodies | Around twenty, from the Claw 02 Hoodie to the Box Logo Hoodie |
| Sweatshirts | Mid-teens, with the quarter zips and oversized cuts counted in |
| Sweatpants | Under ten, which is why they repeat in your shortlist |
| Shorts | Under ten as well, the shallowest section in the shop |
That shape is useful before you click a single thing. If a graphic tee is what you want, you’ve got real choice, and you can afford to be picky about the print. If you’re after sweatpants or shorts, the whole section fits on one screen, so the decision is small, and you can make it in a couple of minutes.
My first cut is the calendar
Shorts come off first. In Toronto or Montreal in November a pair of shorts is a purchase you’re storing for six months, and storing a CA$99 item isn’t wearing it, so I push that section aside unless the price has dropped far enough to be worth the wait. Tees survive the cut because they layer under a hoodie, which is pretty much what a tee does here from October onwards.
Reading the product titles like a spec sheet
With no measurements anywhere, the titles turn into the only written information you get, and they’re surprisingly chatty once you’ve read forty of them. Most run about six words. Those six words usually cover the finish, the cut and the graphic, which is more or less everything a description would have told you anyway.
Snow washed, mineral wash, washed black — those three keep turning up, and they’re all pointing at a faded surface instead of a flat solid colour. Raw edge, as in the Point Em Out Raw Edge Snow Washed Tee, is a hem nobody bothered to finish, and that’s on purpose, so don’t read it as a fault. Dolman and boxy and oversized (the CRKS Dolman Boxy Sweatshirt manages two of the three) mean a wider body, generally with a shorter sleeve hanging off it. Embroidered versus screen print is a construction note hiding in plain sight. And quarter zip, as in the Gothic Fade Quarter Zip, is telling you about the collar, which is what decides whether something layers under a coat or sits on top of everything.
The graphic families repeat across sections too — Medusa, Skull Bunny, Claw, Castles, Script Logo. The Greco Medusa Tee and the Gold Medusa Sweatpants aren’t sold as a set, but they clearly come from the same drawer, so once a print has caught your eye, typing that one word into the search box beats scrolling the grid a second time.
Eighty-five down to three
Here’s the order I actually work in, and it takes fifteen minutes rather than an evening. The shop spans CA$99 to CA$300, so a ceiling does a lot of the filtering for you on its own.
- I open only the two sections that match the season and leave the other three alone
- I set a ceiling, in CA$, and anything above it stops existing for the night
- I keep every piece whose name tells me something concrete, and skip the ones that only say logo
- I hold the survivors up against what’s already in my closet, because a second washed black hoodie isn’t really a new piece
- I go with the one I can picture on an ordinary Wednesday rather than the one that looks best in the photo
Three is a number you can decide between. Ten isn’t, honestly, and eighty-five is just noise. That last step sounds a bit soft, I know, but it’s where the money gets saved — the loudest print in the grid tends not to be the thing you reach for on a cold Tuesday morning when you’re already late.
| Pro Tip: If two listings look nearly the same in the grid, but the prices don’t match, the gap is usually about which section you’re in and not about the artwork. The same sort of print on a sweatshirt can sit sixty or seventy dollars above its version on a tee, so it’s worth noticing where you’re standing before deciding a number looks wrong. |
Frequently Asked Questions
Am I missing a size chart somewhere?
You’re not. The dropdown offers S through to XXXL and no measurements are published anywhere on the site — no chest, no length, no sleeve. It’s worth knowing that going in, because it means your own wardrobe becomes the reference point.
Where do the tracksuits hide?
Inside the ordinary listings, mixed in with the separates. There are a handful of them, the Core Logo Tracksuit and the Red Script Tracksuit among them, and a full set runs around CA$210 at the discounted price.
What about delivery and returns before I order?
Those terms live on the shop’s own shipping and returns pages, and I’d read them yourself rather than take a number from an article. Order questions go to the support address published on the site.
None of this makes the grid shorter, but it does make it something you can actually finish. Season, ceiling, name, and then a quick look at what’s already hanging in your closet — four passes, and you’re down to a handful of pieces you can genuinely choose between. Have a scroll with that order in mind and see how much faster the shop reads.
Introduction
As October 2026 brings cooler air and thoughts turn to winter comfort, or perhaps you’re already anticipating next spring’s warmth, one thing remains constant: your home’s heating, ventilation, and air conditioning (HVAC) system is its silent workhorse. We all desire a living space that feels just right – warm in winter, cool in summer, and always filled with fresh, clean air. Achieving this ideal indoor comfort isn’t magic; it’s the result of proactive care, much like ensuring a clean residential HVAC system through regular attention.
Seasonal HVAC maintenance is the secret to unlocking this consistent comfort, while also significantly boosting your system’s energy efficiency and extending its system longevity. Think of it as a routine health check-up for the very heart of your home, following a clear seasonal HVAC maintenance timeline.
In this extensive guide, we will explore why timely maintenance is crucial. We’ll outline the most important tasks for both spring/summer cooling and fall/winter heating. We’ll also discuss what you can easily handle yourself and when to rely on a professional. Prepare to discover how a small investment in seasonal care can lead to big savings and a healthier, more comfortable home year-round.
The Financial and Operational Impact of Seasonal HVAC Maintenance
Ignoring your HVAC system’s needs can have far-reaching consequences that extend beyond mere discomfort. The financial and operational impact of neglecting seasonal maintenance can be substantial, affecting everything from your monthly utility bills to the long-term health of your equipment.
One of the most immediate effects is on energy efficiency. Airflow problems alone, often caused by dirty filters or blocked vents, can reduce your system’s efficiency by up to 15 percent. Imagine paying an extra 15% on your energy bill each month simply because your system isn’t breathing properly. A dirty filter forces your blower to work harder, increasing energy consumption and accelerating wear and tear. Similarly, dirty evaporator and condenser coils diminish the system’s ability to transfer heat, making it run longer and consume more power to achieve the desired temperature. This continuous strain not only inflates utility expenses but also shortens the overall equipment lifespan.
Beyond efficiency, there are critical operational safety concerns. Faulty electrical connections, for instance, can lead to unsafe operation and reduce the life of major components. Improperly operating gas or oil connections are a serious fire hazard and can contribute to health problems, including carbon monoxide exposure. A dirty burner or a cracked heat exchanger can cause inefficient combustion and pose significant safety risks. Parts that lack lubrication create friction in motors, increasing electricity usage and causing premature failure. Even a seemingly minor issue like a plugged condensate drain can lead to water damage within your home and negatively affect indoor humidity levels.
Regular maintenance helps identify and address these issues proactively. By ensuring proper refrigerant levels, clean components, and secure electrical connections, your system operates as intended, leading to fewer breakdowns, lower repair costs, and a safer home environment. Professional heating and air conditioning inspections are invaluable for identifying these hidden problems before they escalate into costly emergencies. For a deeper dive into the benefits of such inspections, consider resources like Volpe Service, which emphasize comprehensive checks.
Let’s look at a comparison:
As you can see, the choice to invest in seasonal maintenance is an investment in your home’s comfort, safety, and your wallet.
Comprehensive Year-Round HVAC Preparation Guide
Preparing your HVAC system for the diverse demands of each season is key to ensuring consistent system readiness and optimal seasonal performance. As the year progresses through various weather transitions, a proactive approach to maintenance, including regular thermostat calibration, ensures your system is always ready to deliver comfort efficiently.
Spring and Summer Seasonal HVAC Maintenance Tasks
As the days lengthen and temperatures rise, your cooling system takes center stage. Spring is the ideal time to prepare your HVAC for the warmer months ahead.
- Clean or Replace Air Filters: This is a fundamental task that impacts both efficiency and indoor air quality. A clean filter ensures proper airflow and prevents dust buildup on internal components.
- Inspect and Clean Condenser Coils: The outdoor unit’s condenser coils can accumulate dirt, leaves, and debris, especially after winter. This grime acts as an insulator, hindering heat transfer. Cleaning these coils allows the system to dissipate heat more effectively, improving efficiency.
- Check Refrigerant Charge and Levels: Too much or too little refrigerant makes your system less efficient, increases energy costs, and reduces equipment life. A professional will verify the correct charge and check for leaks.
- Inspect Condensate Drain Lines: The condensate drain removes moisture from your home. A clogged drain can cause water backup, leading to leaks, water damage, and increased indoor humidity. Ensure it’s clear of obstructions.
- Examine Electrical Wiring and Connections: Loose or corroded electrical connections can be dangerous and cause components to fail. A technician will tighten connections and measure voltage and current on motors.
- Lubricate Moving Parts: Components like the blower motor and fan require lubrication to reduce friction, ensuring smooth operation and preventing premature wear.
- Test Thermostat Functionality: Ensure your thermostat is accurately reading temperatures and effectively communicating with your system to switch between cooling cycles.
Fall and Winter Seasonal HVAC Maintenance Checklist
As autumn leaves begin to fall and the chill of winter approaches, shifting focus to your heating system becomes paramount. Early fall, before the peak heating season, is the best time for these preparations.
- Inspect and Clean Heat Exchanger: This is a critical safety check for furnaces. A cracked heat exchanger can leak carbon monoxide into your home. Professionals will inspect it thoroughly for any signs of damage.
- Check Burner Combustion and Gas Valves: Proper burner combustion is essential for efficient and safe heating. Technicians will clean burners, adjust gas pressure, and ensure all gas valves are functioning correctly.
- Verify Flue Venting: The flue safely expels combustion byproducts. Ensure it’s free of obstructions and properly sealed to prevent dangerous gases from entering your home.
- Test Carbon Monoxide Detectors: With heating systems in operation, ensuring your carbon monoxide safety devices are working is non-negotiable. Test them and replace batteries annually.
- Inspect Electrical Connections: Just like with cooling systems, all electrical connections for your furnace need to be tight and secure to prevent hazards and ensure reliable operation.
- Clean or Replace Air Filters: Again, a clean filter is crucial for efficient heating and good indoor air quality.
- Check System Controls: Ensure all safety controls and the starting cycle of the heating system are operating as designed.
- Inspect and Clean Blower Components: The blower distributes heated air throughout your home. Cleaning and adjusting it ensures even heating and efficient airflow.
For comprehensive care of your home’s heating and ventilation systems, including detailed inspections and preventative maintenance, consulting specialists in residential heating and ventilation can provide peace of mind and ensure your system is ready for the coldest months. Arizona State HVAC is a great example of a company focused on residential systems.
Allocating Responsibilities: DIY Upkeep vs. Professional Servicing
Maintaining your HVAC system doesn’t have to be an all-or-nothing endeavor. Many tasks can be handled by a diligent homeowner, while others are best left to the expertise of a certified professional. Understanding this distinction is crucial for both safety and effectiveness.
The most common and impactful DIY task is filter replacement. Air filters should be inspected monthly and replaced every one to six months, depending on factors like household occupancy, pets, and local environmental conditions. During peak seasons or if you have allergies, replacing them every 1-3 months might be necessary. Choosing the correct MERV ratings (Minimum Efficiency Reporting Value) is also important; MERV 8-11 is suitable for most homes, while MERV 13 can offer better filtration for allergy sufferers, provided your system can handle the increased airflow resistance. A dirty filter can increase energy consumption by up to 15% and shorten your unit’s lifespan.
Other homeowner-friendly tasks include:
- Clearing debris from around the outdoor condenser unit (maintaining at least two feet of clearance).
- Ensuring indoor vents and registers are unobstructed by furniture or drapes.
- Testing your thermostat to confirm it switches between modes and holds temperature settings accurately.
- Checking carbon monoxide and smoke detectors regularly.
- Keeping the area around your furnace clear of flammable materials.
However, certain tasks require specialized tools, knowledge, and safety precautions, making them strictly for professionals. These include:
- Tightening electrical connections and measuring motor voltage/current.
- Lubricating motors and other moving parts.
- Inspecting and cleaning evaporator and condenser coils (beyond surface debris).
- Checking and adjusting refrigerant levels.
- Inspecting the heat exchanger for cracks or damage.
- Cleaning and adjusting burner components for gas or oil furnaces.
- Inspecting gas/oil connections and pressure.
- Checking condensate drain lines for blockages that are not easily accessible.
- Verifying system controls and starting cycles.
Here’s a comparison of typical DIY and professional tasks:
While DIY efforts contribute significantly to HVAC health, scheduling professional service at least once a year, ideally semi-annually (spring for cooling, fall for heating), is essential for comprehensive checks, safety assurances, and maintaining warranty validity.
Optimizing Indoor Air Quality and Humidity Across Seasons
Beyond temperature control, your HVAC system plays a vital role in maintaining optimal indoor air quality (IAQ) and humidity levels, which directly impact comfort and occupant health. Poor IAQ can exacerbate allergies, respiratory issues, and overall well-being.
A common target for indoor humidity is 40 to 50 percent relative humidity. This range is comfortable for most people and helps prevent the growth of mold and mildew, while also deterring static electricity and preserving wood furnishings. Humidified air also feels warmer than dry air at the same temperature, potentially allowing you to lower your thermostat a degree or two in winter and still feel cozy, saving energy. In dry winter climates, a whole-house humidifier can be integrated with your HVAC system to add moisture, while in humid summers, your AC acts as a dehumidifier. A plugged condensate drain, as mentioned earlier, can directly affect humidity levels.
To enhance IAQ, especially in today’s increasingly sealed homes, consider advanced solutions:
- Enhanced Filtration: Upgrading to higher MERV-rated filters (MERV 8-13) can capture smaller particles, including pollen, pet dander, and dust mites. For example, during Central Texas’s cedar pollen season (mid-December through February), a higher MERV filter can significantly reduce indoor allergens.
- ERV/HRV Ventilation: Energy Recovery Ventilators (ERVs) and Heat Recovery Ventilators (HRVs) are excellent for introducing fresh outdoor air into a sealed home while minimizing energy loss. ERVs transfer both heat and moisture, making them suitable for mixed climates, while HRVs primarily transfer heat, ideal for colder regions. These systems help dilute indoor pollutants without compromising energy efficiency.
- UV-C Lighting: Installing UV-C lighting inside your HVAC system, typically near the evaporator coil, can sterilize airborne contaminants like mold, bacteria, and viruses as they pass through. UV-C output drops after about 9,000 hours of operation, so bulbs need periodic replacement.
- Duct Sealing: Leaky ducts can draw in unfiltered air from attics, crawl spaces, or wall cavities, introducing dust, allergens, and other pollutants into your living space. Professional duct sealing ensures that all conditioned air reaches its intended destination, improving both IAQ and system efficiency.
By proactively managing these aspects, you create a healthier, more comfortable indoor environment year-round.
Distinguishing Residential and Commercial HVAC Maintenance Needs
While the fundamental principles of heating and cooling remain the same, there are significant differences between maintaining a commercial HVAC system and a residential one. These distinctions arise from scale, complexity, and the impact of system performance on occupants.
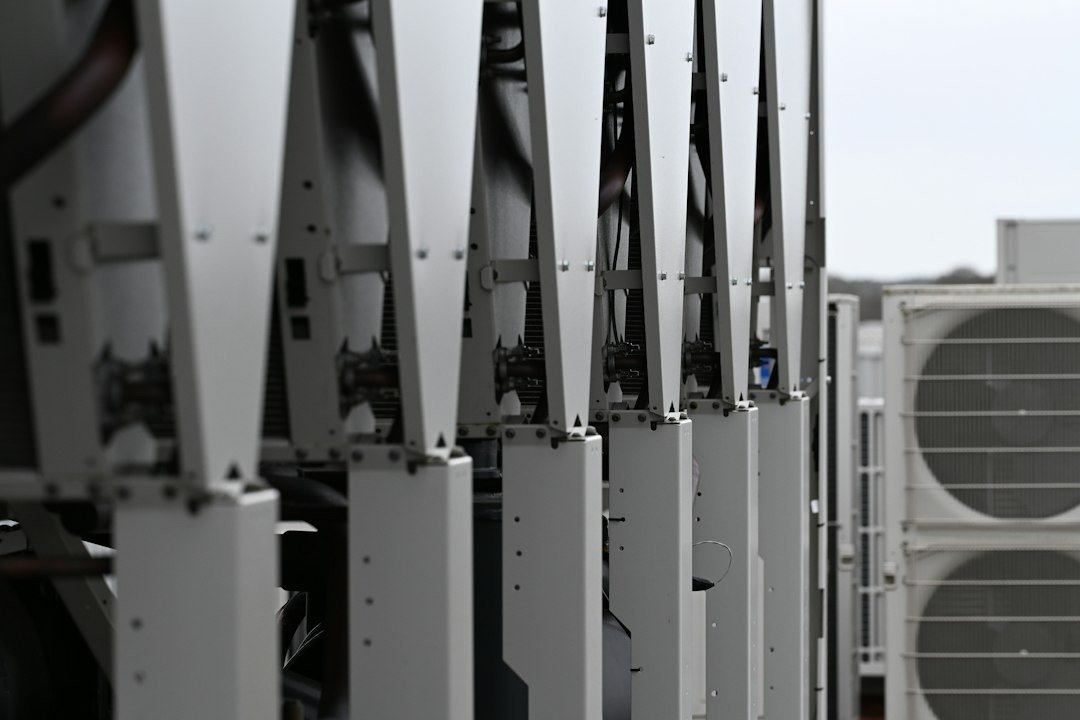
Scale and Equipment: Commercial HVAC systems are typically much larger and more complex. They often involve multiple units, such as commercial rooftop HVAC units, compared to the single split systems or package units found in most homes. The equipment tonnage (cooling capacity) is considerably higher for commercial applications, designed to condition vast spaces.
System Design and Controls: Commercial buildings frequently employ sophisticated multi-zone controls to manage different temperature requirements across various offices, retail spaces, or production areas. They might also integrate features like economizer dampening, which uses outdoor air for cooling when conditions are favorable, a feature rarely found in residential setups. Residential systems, while sometimes having multiple zones, are generally simpler in their control mechanisms.
Usage and Demands: Commercial systems operate under more strenuous conditions, often running continuously for longer hours with higher occupancy loads. This constant demand means they accumulate wear and tear more rapidly than residential systems. The consequences of a commercial system failure can be catastrophic, leading to lost productivity, damaged goods, or even closure of operations.
Maintenance Schedules and Goals: Commercial entities often adhere to more rigorous preventative schedules, sometimes quarterly or even monthly, to minimize downtime and ensure compliance with regulations. The primary goal extends beyond comfort to include maintaining occupant productivity, protecting sensitive equipment, and ensuring business continuity. Residential maintenance, while crucial, typically aims for comfort, energy savings, and system longevity, with semi-annual checks being the norm.
Specialized Components: Commercial systems may include specialized components like cooling towers, chillers, variable air volume (VAV) boxes, and complex building management systems (BMS) that require highly specialized expertise for maintenance and repair.
While both residential and commercial systems benefit from regular care, the scale, complexity, and stakes involved in commercial HVAC necessitate a more frequent, detailed, and specialized approach to maintenance.
Frequently Asked Questions
Understanding the nuances of seasonal HVAC maintenance often brings up common questions regarding operational costs, equipment reliability, and scheduling best practices. Here, we address some of these key inquiries to help you better manage your home’s comfort system.
How often should HVAC systems be professionally inspected?
For optimal performance, efficiency, and longevity, HVAC systems should be professionally inspected at least twice a year. This typically translates to a semi-annual frequency: once in the spring for a spring cooling tune-up and once in the fall for a fall heating inspection. Scheduling these pre-season check-ups ensures that your system is prepared for the demands of extreme temperatures, preventing unexpected breakdowns and maximizing efficiency when you need it most. This proactive approach also helps maintain any manufacturer warranties, which often require proof of regular professional maintenance.
What are the main consequences of skipping seasonal maintenance?
Skipping seasonal HVAC maintenance can lead to a cascade of negative outcomes:
- Efficiency Drop: Without regular cleaning and tuning, components like coils and filters become dirty, forcing the system to work harder. This results in a significant efficiency drop, increasing your energy bills. Airflow problems alone can reduce efficiency by up to 15%.
- Premature Failure: The added strain on neglected components leads to accelerated wear and tear, causing premature failure of parts or even the entire unit. This means you might need to replace your HVAC system years earlier than expected.
- Emergency Breakdowns: Untended minor issues can quickly escalate into major problems, often resulting in inconvenient and costly emergency breakdowns during peak heating or cooling seasons when repair services are in high demand and potentially more expensive.
- Higher Repair Costs: Neglected systems are more prone to costly repairs. A small, easily fixable issue identified during maintenance can become a major, expensive repair if left unchecked.
- Compromised Indoor Air Quality: Dirty filters and uncleaned ducts can circulate dust, allergens, and pollutants throughout your home, negatively impacting indoor air quality and occupant health.
- Voided Warranties: Many HVAC manufacturers stipulate that regular professional maintenance is required to keep your warranty valid. Skipping these services could mean you’re on the hook for full repair or replacement costs.
How often should air filters be replaced during peak seasons?
During peak heating and cooling seasons, when your HVAC system is running frequently, air filters should generally be replaced every 1-3 month intervals. However, this frequency can vary significantly based on several factors:
- Household Occupancy: Homes with more residents tend to generate more dust and require more frequent filter changes.
- Pets: Homes with furry friends will need filters changed more often due to increased pet dander.
- Allergies or Respiratory Conditions: If anyone in your household suffers from allergies or asthma, more frequent filter changes (and potentially higher MERV ratings) can help improve indoor air quality and reduce allergen reduction.
- Local Environmental Factors: High pollen counts, construction nearby, or living in a dusty area can necessitate more frequent replacements.
- Filter Type: Some higher-end filters are designed for longer lifespans, but checking them monthly is still a good practice.
A dirty filter restricts airflow, making your system work harder, increasing energy bills, and shortening its lifespan. It’s a simple, inexpensive task that yields significant benefits.
Conclusion
As we navigate through the seasons of 2026 and beyond, the message is clear: proactive seasonal HVAC maintenance is not merely a recommendation; it’s a fundamental pillar of home comfort, safety, and financial prudence. By embracing a strategy of regular care, both through diligent DIY efforts and professional inspections, we ensure our HVAC systems deliver consistent indoor comfort year-round.
The benefits extend far beyond a perfectly temperate home. We optimize system reliability, drastically reduce energy consumption through enhanced energy optimization, and significantly prolong the lifespan of our valuable equipment. From the meticulous cleaning of condenser coils in spring to the critical inspection of heat exchangers in fall, each task contributes to a healthier, more efficient living environment.
Proactive planning for your HVAC system is an investment in your home’s future. It prevents costly emergency repairs, safeguards against potential health hazards, and ensures that your home remains a sanctuary of comfort, no matter what the weather outside brings. Make seasonal HVAC maintenance a priority, and enjoy the peace of mind that comes with a well-cared-for home.

Pool Maintenance: The Hidden Business Costs of Neglecting Your Facility

Prevention Cloud: A Complete Guide to Workplace Wellness and Cloud Security

Neatie: Personalized Jewelry, Custom Necklaces, and Complete Buying Guide
Who Is Gale Burnick? The Story Of George R. R. Martin’s Ex Wife

Who Is Hermann Nicoli? The Full Story Of Candice Swanepoel’s Former Fiancé

Who Is Alicia Dove? The Life Story Of Corey Taylor’s Wife
-
Celebrity4 months ago
Who Is Gale Burnick? The Story Of George R. R. Martin’s Ex Wife
-
 Celebrity4 months ago
Who Is Hermann Nicoli? The Full Story Of Candice Swanepoel’s Former Fiancé
-
 Celebrity4 months ago
Who Is Alicia Dove? The Life Story Of Corey Taylor’s Wife
-

 Celebrity4 months ago
Meet Carole Rogers: Everything to Know About Kenny Rogers’ Daughter
-

 Celebrity4 months ago
Who Is Anna Hillinger? The Full Life Story Of Mike Shinoda’s Wife
-

 Celebrity4 months ago
Who Is Sydney Davis? The Full Story Of Billy Bush’s Ex Wife
-

 Celebrity4 months ago
Who Is Demacio Castellon? Life Story Of Nelly Furtado’s Ex Husband
-

 Blog2 months ago
What Is Sosoactive? A Complete Guide to the Digital Platform