
Business
When Nature Crosses the Threshold: Protecting Your Home From Wildlife


Most homeowners rarely think about wildlife until scratching starts in the attic, droppings appear near the garage, or a vent suddenly becomes a nesting site. What seems like a small nuisance can turn into expensive damage to insulation, wiring, roofing, and indoor air quality. Wildlife intrusions can also create sanitation concerns and costly repairs, making early detection and prevention important.
Small Signs Can Point to a Bigger Problem
Wildlife intrusions often begin with a small opening: a loose vent cover, a damaged soffit, a gap around a pipe, or an unsealed crawl space. Animals are looking for shelter, warmth, food, and a place to raise their young. Once they find a convenient route inside, they may return repeatedly.
Listen for scratching or movement in ceilings and walls. Look for torn insulation, disturbed storage, droppings, greasy marks near openings, or unusual odors. These clues can help you identify an area that needs inspection, but sound alone rarely confirms which animal is present.
Why Quick DIY Fixes Can Backfire
Sealing the first visible hole may seem efficient, but it can trap an animal inside or separate adults from their young. That can lead to further damage, distress, and difficult cleanup. Trapping and relocation can also be unsafe or restricted, depending on the species and local rules.
Avoid using poison, improvised traps, or chemicals without understanding the risks. Never block an opening until you are confident the space is empty, and any young animals have been accounted for. If activity continues after a repair, assume there may be another access point rather than repeatedly patching the same spot.
When the animal’s identity is uncertain, the entry point is difficult to reach, or the problem involves a nest, professional wildlife control services can help assess the situation, remove the animal appropriately, and recommend exclusion work.
Understand the Risks Beyond the Noise
The sound of an animal overhead may be irritating, but hidden damage can be more serious. Chewed wiring can create a fire hazard, while damaged insulation and ductwork can reduce heating and cooling efficiency. Waste and nesting materials may contaminate surfaces and leave persistent odors.
Avoid disturbing droppings or nesting material before you understand what is present. Sweeping or vacuuming rodent waste can put contaminated particles into the air. If you find substantial contamination, damaged ventilation, or waste in an inaccessible space, seek professional advice about safe cleanup.
For smaller rodent-related contamination, the CDC’s guidance on cleaning up after rodents explains why protective equipment, disinfecting, and careful handling matter.
Identify the Animal Before Choosing a Response
Different animals leave different clues, but guessing can lead to the wrong solution. Squirrels may enter roof spaces and chew materials. Raccoons can damage vents or roof edges while searching for shelter. Birds may nest in vents or chimneys, while bats can squeeze through narrow gaps. Rodents often move through walls, cupboards, and utility openings.
Droppings, tracks, disturbed insulation, and the location of an opening may provide useful evidence.
Do not corner, handle, or attempt to capture an unfamiliar wild animal. An animal that feels trapped may bite or scratch, and apparently healthy wildlife can still carry disease. Keep children and pets away, give the animal a clear path to leave if it is safely outside, and contact an appropriate professional when it is indoors or behaving unusually.
What a Thorough Wildlife Response Should Include
A good response starts with an inspection of the attic, roofline, vents, crawl spaces, and other likely access points. The technician should identify the species where possible, determine whether young animals may be present, and explain the proposed removal method. Ask how the work will avoid trapping animals inside and how re-entry will be prevented.
Removal is only one part of the process. Durable repairs may include securing vent covers, closing gaps, reinforcing weak exterior materials, and addressing more than one opening. If insulation, wiring, or ductwork has been damaged, ask what needs to be inspected or repaired before the space is used normally again.
Clarify whether cleanup is included, what the estimate covers, and whether follow-up inspection is recommended.
Make Your Property Less Inviting
Prevention begins with removing easy access to food, water, and shelter. Keep rubbish bins tightly closed, store pet food securely, and bring outdoor food bowls inside overnight. Trim branches that provide easy access to the roof, and maintain screens over vents and chimneys. Check exterior doors, fascia, roof edges, and utility penetrations for gaps or deterioration.
Keep storage areas organized so you can spot signs of activity early. Repair leaks and avoid leaving clutter or nesting materials close to the house.
The wildlife conflict-prevention guide offers practical advice on limiting access to shelter, securing food, and making outdoor spaces less attractive to wildlife.
Know When Not to Wait
Arrange an inspection if noises recur, droppings appear, an animal enters a living area, or you notice damage around vents, wiring, or roofing. Act promptly if you suspect young animals are present or if the animal seems disoriented or unusually aggressive. Do not touch a bat or any wild animal that may have bitten or scratched someone; seek appropriate medical guidance if contact occurs.
Identify the signs, keep your distance, address the entry points, and get qualified help when the situation calls for it. Early action can limit repair costs, protect indoor conditions, and help ensure the animal is handled responsibly.
Your home should be a safe place for your family—not an accidental shelter for wildlife. With sensible maintenance and a complete response, you can restore that boundary before a small intrusion becomes a costly repair project.
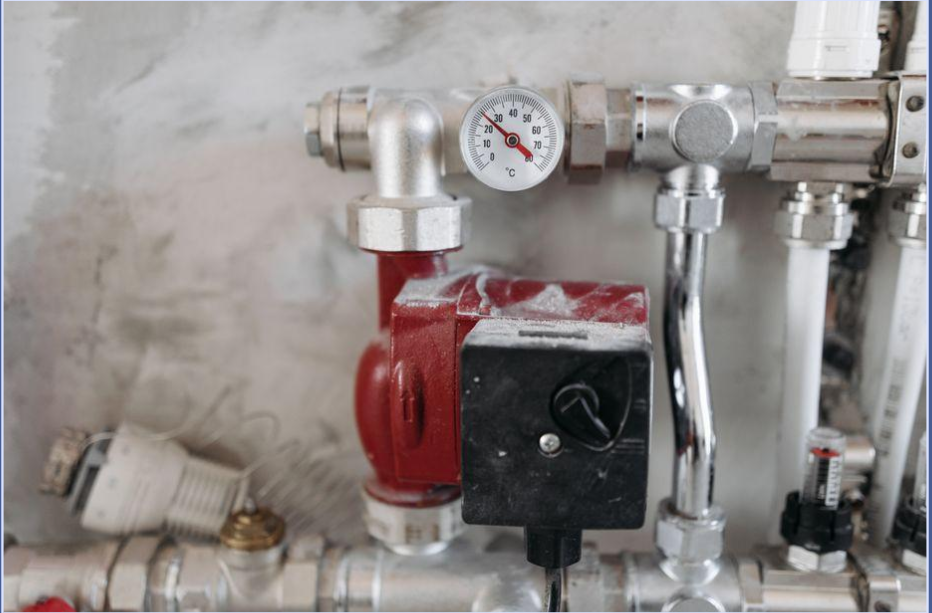
If you’re thinking about adding a well pump to your property, you’re probably chasing one thing: reliable water without depending completely on a municipal supply. That can be a smart move, especially for larger lots, irrigation-heavy yards, and homes where water demand spikes fast. A well system can give you more control, but only if you understand the setup, costs, and maintenance before the digging starts.
Site Conditions Matter More Than Most Homeowners Expect
Not every property is equally friendly to a well setup. Soil conditions, water table depth, property layout, and local regulations all influence what’s possible and what it will cost. A neighbor’s setup may offer a rough reference, but it shouldn’t become your blueprint.
A few site-specific issues can change the project quickly:
– Depth to groundwater
– Distance from septic systems
– Available access for drilling equipment
– Local permitting requirements
– Water quality concerns in the area
Before any serious work begins, it makes sense to bring in a professional who can assess the property and explain the practical limits. If you’re evaluating well pump installation, that usually means looking beyond the pump itself and focusing on the full system design, water source conditions, and long-term serviceability.
That planning stage may not be flashy, but it saves you from expensive surprises later.
Start With Your Water Needs, Not the Equipment
It’s easy to jump straight into pump types and horsepower numbers, but your actual water usage should lead the conversation. A small household with basic indoor use has very different needs than a property with sprinklers, livestock, or a backyard that drinks water like it’s training for a marathon.
Make a list of what the well will support:
– Indoor household fixtures
– Lawn or garden irrigation
– Pool filling or outdoor water features
– Barns, workshops, or detached structures
– Seasonal versus year-round use
You’ll also want to think about peak demand. Two showers, a dishwasher cycle, and irrigation running at once can push a weak system pretty hard. If the pump is undersized, pressure issues show up fast. If it’s oversized, you can end up paying more upfront and dealing with unnecessary wear on the system.
Understand the Main Parts of a Well System
A well pump system is more than a single piece of hardware buried out of sight. It’s a group of components that need to work together cleanly and consistently. If one part is off, the whole system can become temperamental.
The main components usually include:
– The well itself
– A submersible or jet pump
– Pressure tank
– Pressure switch
– Piping and wiring
– Filtration or water treatment, if needed
Submersible pumps are common for deeper wells because they sit down in the well and push water upward. Jet pumps are often used for shallower wells and are usually mounted above ground. The pressure tank helps regulate water flow and keeps the pump from cycling on and off too often, which is a quick way to shorten its lifespan.
Think of the system like a team sport. One weak player and the whole game gets messy.
Budget for More Than the Initial Installation
A lot of homeowners focus on the drilling and pump price, then get blindsided by the supporting costs. The full budget can include electrical work, trenching, pressure tanks, water testing, permits, and treatment equipment. If your water has high mineral content, iron, or sediment, you may need additional filtration from day one.
It helps to separate costs into categories:
– Well drilling
– Pump and tank equipment
– Labor and installation
– Electrical connections
– Permitting and inspections
– Water testing and treatment
– Future repairs and maintenance
Operating cost matters too. Pumps use electricity, and some systems work harder than others depending on depth and demand. A cheaper setup that struggles constantly isn’t much of a bargain. The smartest budget is the one that includes durability, not just the first invoice.
Water Quality Deserves Just as Much Attention as Water Quantity
Getting water out of the ground is only half the job. You also need to know whether that water is suitable for drinking, bathing, cooking, or irrigation. Well water can contain sediment, bacteria, sulfur, iron, manganese, or hard water minerals. Sometimes the issue is obvious. Sometimes it hides behind clear-looking water and shows up later in stains, odors, or appliance wear.
A proper water test can help you identify:
– Bacteria or microbial contamination
– Hardness levels
– pH balance issues
– Iron and sulfur content
– Nitrates or other local contaminants
If you’re planning to use the well for irrigation only, treatment needs may be lighter. If the system will supply your home, quality testing becomes a non-negotiable step. Skipping that process is a gamble, and groundwater is not the place for mystery flavor.
Maintenance Is Part of the Deal
A well pump system isn’t install-and-forget technology. It can run reliably for years, but only with periodic inspection and prompt attention when warning signs show up. Strange noises, low pressure, air sputtering from faucets, dirty water, or higher electric bills can all point to trouble.
Good maintenance habits include:
– Testing water quality regularly
– Checking pressure performance
– Inspecting the tank and controls
– Watching for leaks or cycling issues
– Servicing the system when output changes
Pump lifespan varies based on usage, water quality, and installation quality. Some systems last well over a decade. Others wear out earlier because they were poorly matched to the property or forced to work under bad conditions.
You don’t need to become a pump technician overnight, but you do need to pay attention. Small issues tend to send very expensive invitations when ignored.
Think Long Term Before You Commit
A well pump can be a strong investment if your property needs independent water access for household use, landscaping, or agricultural support. It can also increase flexibility when municipal water is costly, limited, or unavailable. Still, the best outcomes usually come from careful planning rather than impulse decisions.
Before moving ahead, ask yourself:
– How much water do you realistically need?
– Will the system support future property changes?
– Are you prepared for maintenance and testing?
– Have you accounted for treatment and repair costs?
– Is the site suitable for a dependable setup?
When the answers are clear, the project becomes much easier to manage. You’re not just buying a pump. You’re building part of your property’s core infrastructure. Treat it that way, and you’ll make choices that hold up long after installation day.


A lab-grown diamond begins with carbon, careful engineering, and a tiny diamond seed. While the process is highly technical, understanding how to make a lab-grown diamond helps jewelry buyers see why two stones with similar carat weights can still differ in appearance, documentation, and price.
Like a mined diamond, a laboratory-grown diamond must be shaped into a finished gemstone before it reaches a ring, pendant, or pair of earrings. The path from rough crystal to fine jewelry includes growth, quality checks, cutting, polishing, grading, and clear disclosure.
Why The Production Process Matters
A diamond’s origin describes how it formed, while its beauty depends on a wider set of characteristics. Carat weight, proportions, cut quality, color, clarity, polish, and symmetry all influence what a buyer sees. Production details matter because growth conditions can leave features that affect the stone’s appearance or determine whether it needs post-growth treatment.
A laboratory-grown diamond is not a simulant. Simulants such as cubic zirconia and glass are different materials made to resemble diamonds. In contrast, a lab-grown diamond has the same chemical composition and crystal structure as a natural diamond, although trained laboratories can identify growth-related features using specialized testing.
The Two Main Growth Methods
High-Pressure, High-Temperature Growth
High-pressure, high-temperature (HPHT) conditions recreate conditions that allow diamond crystal growth in a controlled machine. A diamond seed is placed with a carbon source and, commonly, a metal solvent. The system applies intense pressure and heat so carbon can dissolve and crystallize onto the seed.
Stable conditions are essential. Changes in temperature, pressure, or the growth environment can affect crystal development, internal features, and color. HPHT is used for both industrial diamond material and gem-quality stones.

Chemical Vapor Deposition
Chemical vapor deposition, or CVD, grows diamond in a chamber using carbon-containing gases. The gases are activated so carbon-bearing species deposit onto a prepared diamond substrate, building the crystal layer by layer. The process operates differently from HPHT, but both methods can produce gem-quality diamonds.
The growth patterns associated with HPHT and CVD can differ, which is one reason gemological laboratories use advanced instruments to determine origin. The Gemological Institute of America explains how HPHT and CVD diamond growth processes can leave identifying characteristics that help distinguish laboratory-grown diamonds from natural stones.
From Diamond Seed To Rough Crystal
The process starts with a suitable diamond seed, which is cleaned and prepared before entering the chosen growth system. Technicians then set the growth conditions and monitor the cycle as carbon accumulates on the seed, creating a larger, rougher crystal.
- Select and prepare the diamond seed.
- Remove contamination that could interfere with growth.
- Place the seed in an HPHT press or CVD chamber.
- Control heat, pressure, gases, and growth time.
- Remove the rough crystal for inspection.
Fast growth is not the only objective. A larger crystal is useful only if it can produce an attractive, durable finished stone. Careful control helps manufacturers manage color, strain, inclusions, and other features that may affect cutting plans.
How Quality Control Shapes The Stone
Quality control continues throughout production. Technicians monitor equipment stability and inspect rough material after growth. If a crystal has undesirable color, visible inclusions, cracks, or an inefficient shape for cutting, it may be treated, recut, reserved for industrial use, or rejected for fine jewelry.
Post-growth treatment may be used to alter a diamond’s color, so buyers should ask whether treatment was detected or disclosed. Automated controls and sensors can help operators track the growth environment, but they do not remove the need for professional inspection and grading.
How Rough Crystals Become Jewelry
A rough crystal does not yet have the brilliance associated with a polished diamond. Before cutting begins, planners examine its shape, inclusions, color distribution, and internal structure to determine which finished form will best balance beauty, durability, and retained weight.
- Sorting: Review the rough crystal’s size, shape, color, and visible features.
- Planning: Map potential cuts and decide how to manage inclusions or growth features.
- Marking and dividing: Mark cutting lines, then saw or laser-cut the rough if needed.
- Shaping and faceting: Form the outline and create facets that control light return.
- Polishing and inspection: Refine every facet, then check symmetry, polish, and durability.
Grading, Reports, And Disclosure
An independent grading report gives buyers a consistent way to compare diamonds. It typically records carat weight, color, clarity, cut-related information, measurements, and identifying details. Measurements and proportions matter because two diamonds of equal weight can look noticeably different in face-up size or brightness.
Reports may also identify the growth method and note post-growth treatment. Laser inscriptions can connect a diamond to its report number, but buyers should verify that the inscription, report, and physical stone match. The broader history and terminology behind the synthetic diamond category also help clarify why laboratory-grown diamonds should not be confused with imitation stones.
Uses Beyond Jewelry
Diamond’s hardness and thermal properties make synthetic diamond valuable outside jewelry. It is used in abrasive and cutting applications, and diamond material can be used for heat-spreading components. Researchers also study diamond for specialized sensors, optical components, and electronic or quantum-related applications where its physical properties may be useful.
A Practical Buyer Checklist
- Confirm the stone is clearly described as laboratory-grown.
- Review the grading report number and match it to any laser inscription.
- Compare cut quality, proportions, polish, symmetry, and face-up size.
- Ask whether post-growth treatment was detected or disclosed.
- View the actual diamond through clear images, video, or in person when possible.
- Review the seller’s return policy, warranty, resizing options, and care guidance.
- Compare several stones rather than relying on carat weight alone.
Common Questions
Are Lab-Grown Diamonds Real Diamonds?
Yes. The term describes the origin, not an imitation material. Lab-grown diamonds are diamonds, while simulants are different materials that only resemble diamonds.
How Long Does It Take To Grow One?
Timing varies with the method, equipment, target size, color, and quality goals. There is no single production time that applies to every diamond.
Can A Lab-Grown Diamond Have Inclusions?
Yes. Both natural and laboratory-grown diamonds can contain inclusions or growth features. Their visibility, location, and effect on clarity vary from stone to stone.
Can Buyers Tell The Difference By Looking?
Not reliably. A grading report and professional laboratory testing provide stronger evidence of a diamond’s origin than visual inspection alone.
Final Thoughts
Lab-grown diamonds are the result of a complete production chain, not simply a growth chamber. The crystal must be grown, inspected, potentially treated, planned, cut, polished, graded, and accurately disclosed. Looking at each stage helps buyers focus on what matters most: a diamond’s documented identity, visual performance, craftsmanship, and suitability for the jewelry they want to wear.


Payroll is one of the most visible responsibilities a business has. Employees expect their pay to arrive on the right date and reflect the hours, rates, deductions, and changes that apply to them. Understanding how payroll services work for employers of any size can help leaders create a process that is consistent, documented, and easier to manage from one pay period to the next.
A reliable process is more useful than a last-minute scramble. For example, an employee may receive an incorrect overtime payment if a recent pay rate change is approved but not entered before the payroll cutoff. A checklist provides payroll staff with a clear sequence for confirming information, identifying exceptions, and escalating questions before funds are released.
Why Payroll Accuracy Matters
Payroll affects more than a direct deposit. Errors can create employee frustration, lead to corrections in accounting records, and complicate tax or benefit reporting. Consistent review steps also make it easier to explain how a payment was calculated when an employee asks a question.
The goal is not to slow down payroll. It is to assign ownership for key tasks, set realistic cutoffs, and make exceptions visible. When the same checks happen every cycle, the team can spend less time searching for information and more time resolving the items that truly need attention.
Step 1: Review Employee Information
Before calculating wages, confirm that each employee record reflects the information currently in effect. Changes should be approved and entered before the payroll processing deadline.
- Name, address, and contact details
- Worker classification and employment status
- Hourly rate, salary, commission arrangement, or other pay terms
- Pay frequency and work location
- Tax withholding elections and authorized deductions
- Benefit and retirement contribution elections
- Electronic payment details, where applicable
New hires, promotions, relocations, leaves of absence, and terminations deserve focused attention. A work-location change, for instance, may affect the state or local rules that apply to wages, withholding, and pay statements.
Step 2: Confirm Hours And Pay Rates
Review time and earnings information for the correct work period. This applies to hourly employees as well as workers who receive overtime, tips, commissions, bonuses, shift differentials, or other variable compensation.
- Confirm that submitted time records cover the correct dates.
- Resolve missing punches, unusual hours, and approved edits.
- Check regular rates, overtime treatment, and special pay codes.
- Verify approved bonuses, commissions, tips, or reimbursements.
- Compare current earnings with the prior payroll for unexpected changes.
Employers subject to the Fair Labor Standards Act should maintain the required wage-and-hour information. The Department of Labor outlines recordkeeping requirements under the Fair Labor Standards Act, including the types of employee and wage records employers generally need to keep.
Step 3: Check Deductions And Withholding
Separate required deductions from voluntary deductions. Required items may include applicable income-tax withholding and payroll taxes. Voluntary items may include health plan premiums, retirement contributions, charitable giving, or other employee-authorized deductions. Court-ordered garnishments and similar obligations should be handled in accordance with the applicable order and rules.
Also, confirm whether each deduction is pre-tax or post-tax. Entering a deduction in the wrong category can affect taxable wages and may require a correction later. Review the start date, end date, per-pay-period amount, and any annual limit associated with a benefit election.
Step 4: Calculate Gross Pay And Net Pay
A clear payroll calculation follows a logical path from earnings to take-home pay:
- Calculate regular wages or salary.
- Add eligible overtime, bonuses, commissions, tips, and other earnings.
- Apply approved pre-tax deductions.
- Calculate required withholding and payroll taxes.
- Apply post-tax deductions and authorized payments.
- Confirm the final net-pay amount and payment method.
Large changes from the previous pay period are worth reviewing, even when they are expected. A substantial increase may reflect a bonus or overtime, while a substantial decrease may indicate unpaid time, a missed entry, or a deduction that needs confirmation.
Step 5: Review Federal Payroll Tax Duties
Federal employment tax responsibilities can include withholding, depositing, reporting, and paying applicable taxes, as well as filing required forms. Employers should use current guidance rather than relying on an outdated checklist, as deposit rules, forms, thresholds, and instructions can change. The IRS provides 2026 federal payroll tax instructions for employers in Publication 15, including guidance on withholding, deposits, reporting, and federal unemployment tax.
Step 6: Check State And Local Requirements
Payroll procedures do not automatically transfer from one state to another. Depending on where employees work, employers may need to account for state or local income taxes, unemployment insurance, paid leave programs, minimum-wage rules, wage statements, registration requirements, and final pay deadlines.
- Maintain an up-to-date list of employee work locations.
- Review rate and rule changes before their effective dates.
- Confirm obligations before hiring in a new state or locality.
- Track local taxes when they apply.
- Review final paycheck rules promptly after a termination.
Step 7: Perform A Pre-Processing Review
Before finalizing payroll, assign a reviewer to compare totals and identify exceptions. The review should include new hires, departures, pay-rate changes, unusually high or low net pay, deduction totals, tax totals, the scheduled pay date, and the amount that must be funded.
Automation can reduce manual entry and calculation work, but it cannot correct inaccurate employee data on its own. A second-person review, especially for unusual items, can provide a useful control before payments are submitted.
Step 8: Complete Post-Payroll Tasks
Payroll work continues after payments are processed. Confirm successful payment delivery, investigate rejected deposits or returned payments, save payroll registers and approval records, update accounting entries, and track upcoming tax deposits and filing deadlines. Responding quickly to employee questions can prevent a small issue from carrying into the next pay cycle.
How To Build A Payroll Calendar
Create one shared calendar that includes pay dates, timekeeping cutoffs, manager approval deadlines, payroll submission dates, bank processing lead times, benefit change deadlines, tax deposit dates, and filing reminders. Add early reminders for weekends and holidays, and designate a trained backup contact who can step in when the primary payroll administrator is unavailable.
Common Payroll Errors To Watch For
- Using an outdated pay rate or job classification
- Missing approved overtime or special earnings
- Recording an incorrect work location
- Applying a deduction twice or after it should have ended
- Failing to process an approved withholding update
- Paying a terminated employee incorrectly
- Skipping final approval because of a tight deadline
- Saving incomplete records after processing
When To Review The Process
Review payroll procedures at least annually and whenever the business changes its pay schedule, enters a new state, adds a benefit, hires a large group of employees, or adopts new payroll tools. Document each correction by identifying the process gap, the owner of the fix, and the deadline for completing it.
Conclusion
Accurate payroll depends on steady habits, clear deadlines, and reliable review. A practical 2026 checklist helps employers confirm employee data, validate hours and earnings, apply deductions correctly, meet tax responsibilities, and retain essential records. When every step has an owner, payroll becomes more predictable for the business and more dependable for employees.

When Nature Crosses the Threshold: Protecting Your Home From Wildlife

What You Should Know Before Adding a Well Pump to Your Property

Design and Build Companies London: One Contract, One Price, One Point of Contact
Who Is Gale Burnick? The Story Of George R. R. Martin’s Ex Wife

Who Is Alicia Dove? The Life Story Of Corey Taylor’s Wife

Meet Carole Rogers: Everything to Know About Kenny Rogers’ Daughter
-
Celebrity3 months ago
Who Is Gale Burnick? The Story Of George R. R. Martin’s Ex Wife
-
 Celebrity3 months ago
Who Is Alicia Dove? The Life Story Of Corey Taylor’s Wife
-
 Celebrity3 months ago
Meet Carole Rogers: Everything to Know About Kenny Rogers’ Daughter
-

 Celebrity3 months ago
Who Is Hermann Nicoli? The Full Story Of Candice Swanepoel’s Former Fiancé
-

 Celebrity3 months ago
Who Is Sydney Davis? The Full Story Of Billy Bush’s Ex Wife
-

 Celebrity3 months ago
Who Is Anna Hillinger? The Full Life Story Of Mike Shinoda’s Wife
-

 Celebrity3 months ago
Who Is Demacio Castellon? Life Story Of Nelly Furtado’s Ex Husband
-

 Blog2 months ago
Thetechyx.com: A Complete Guide to Its Tech, Business, and Digital Content